Showing posts with label Stick Pin. Show all posts

Monday, August 20, 2012

Clear It Out ~ DT card

This is my very first Design Team card for Clear It Out challenges. Yippee Skippee! (If you didn't hear the news about my new DT position then you can read all about it here.)

We were challenged to make a card using our own inspiration (a photo, person, colour palette, etc).  And since Clear It Out is all about helping us use up our craft stash we're asking that you use "something glittery".  Finding something glittery in my stash was not a problem at all since I'm a hoarder  uh I mean collector of all things glittery.  LOL  I've used that cute little birdie sitting on the fence.  He's a part of some K&Co. grand adhesions that I've had forever and a day.  Sound familiar?  LOL
I chose the picture below for my inspiration. I found it while googling "color inspiration boards".  I thought the colors were so pretty & fresh. I originally hadn't planned on using the grass, sky & fence for my card.  That just happened as I was designing the card.  Sort of a  "happy accident" I guess you could call it. 

 
Our sponsor for this challenge is Bugaboo Digi Stamps.  I used the adorable digital image called "Ava and Deacon Love Word".  You can find it HERE.  Bugaboo is offering the randomly chosen winner of the challenge 7 free Bugaboo digis.  How cool is that!
This Anniversary card is for a special couple but I can't tell you who it's for yet until after they have received it.  Sssshhhhh.......mum's the word.  ('course if you live across the pond 'mum' has a totally different meaning.  LOL)

You'll notice that I've made another little stick pin & used an envelope punch that I've had a long time.  I made a little note for the happy couple with a Nestie die & added a little ribbon 'pull' so they can see their names below the "Happy Anniversary" (no fair peeking.......I hid it pretty well.....lol).

So please head on over to the Clear It Out challenge blog & use your own inspiration to create a card.  And don't forget to add 'something glittery' from your craft stash.   If you're like me you have a TON of glittery things to choose from.

Challenges I would like to enter:
Delightful Challenges:  Punches & dies (I've used both)
Joyful Stamper ~  Inspire Me Fridays:  #72 Anything Goes
Sweet Stampin' Challenge Blog:  Weddings & Anniversaries
Catch the Bug Challenge Blog:  BINGO (sentiment, ribbon, flower)
The Crafty Pad:  #184 To Die For (use Dies/Punches)
Whimsy Stamps Challenge Blog:  #50 Lots of Layers
Creative Belli Blog:  #150 Winged Things (my little birdie on the fence)
Just Some Lines:  Layer It Up challenge
The Pretty Little Ribbon Shop:  #13 Add some Bling or Sparkle
Mad for Markers Monthly Challenges:  Anything Goes (must use Copics)
Desert Islands Crafts Challenge:  #36 must use at least 3 items from list.  I used "blue, green, make it sparkle, swirls & flowers".
Whoopsi Daisy Challenge:  Include a Sentiment
The Crazy Challenge:  #127 Anything Goes
Tammy's Scrapin Corner:  #24 Anything Goes
Simon Says Stamp & Show:  No Rules! Anything Goes
Hookedoncraft Challenges:  #23 Let's Celebrate! (I'm celebrating an anniversary)
Jackson's Digital Expressions:  Anything Goes #19 with "Inks & Such" (I used Copics)
Crafty Sentiments Designs:  Flowers
Bearly Mine Challenges:  #49 Anything Goes
A and T Emerald Faeries Challenge Blog:  #30 Punches/Dies
Created with Love Challenges:  #3 ~ 3 of a Kind (3 little flowers and 3 "diamonds")
Crafty Boots Challenges:  Tweet Tweet (my little birdie)
Craft Your Passion Challenges:  #124 Power of 3 (3 flowers and 3 "diamonds")

Thanks so much for visiting with me today.  You'll be seeing a lot more crafting from me.  YAY!  I think I found where my craft mojo was hiding.  LOL

Huggies & Sweet Blessings ~♥♥♥~


Supplies used:
  • Copic markers:  E000, E00, R11, R20, E31, E41, E50, B12, B00, B000, B0000, YR20, YR21, Y21, RV21, RV 10, RV000, W00, W0, W1, W3 
  •  DP:  TAC 'Country Cottage', Echo Park 'Hello Summer' and Creative Imaginations Signature Collection 'Gingham'
  • Dies:  Nesties 'Labels One' and 'Classic Squares Large', Taylored Expressions 'Picket Fence Border' die, CB 'Vintage' die (corner)
  • Punches:  EK scallop border, Marvy Uchida envelope punch 
  • Stick pin made using my stash beads and adhered with Glossy Accents
  • Stash Misc:  Heart Doily, forget-me-not flowers, glitter, ribbon, bling, K&Co. Susan Winget Grand Adhesions 'birdie'

    Wednesday, July 25, 2012

    Christmas in July, part 1

    Merry Christmas in July!!! Yippee Skippee!!! Are you celebrating too?  LOL I'm a part of a sweet little group of ladies who I share my life with each & every day on our own private board. These ladies have become my extended family & I love them dearly.

    Christmas in December is always such a hectic time for all of us so we decided to make July a very special time to share gifts with each other.........henceforth we have.......CHRISTMAS IN JULY (who even says "henceforth"? LOL). We've been exchanging these gifts for several years. It's so much fun and we all look forward to seeing what each person receives. There is an abundance of talent in our little group.

    I know I haven't shared many crafts in the last few weeks & this is why.........I've been working on these little gifties & couldn't share them until my swap partner "Mary" opened them today.  Sooooooo today is the day that I get to start sharing them with you over the next week.  **warning......this post is long & filled with lots & lots of pics.

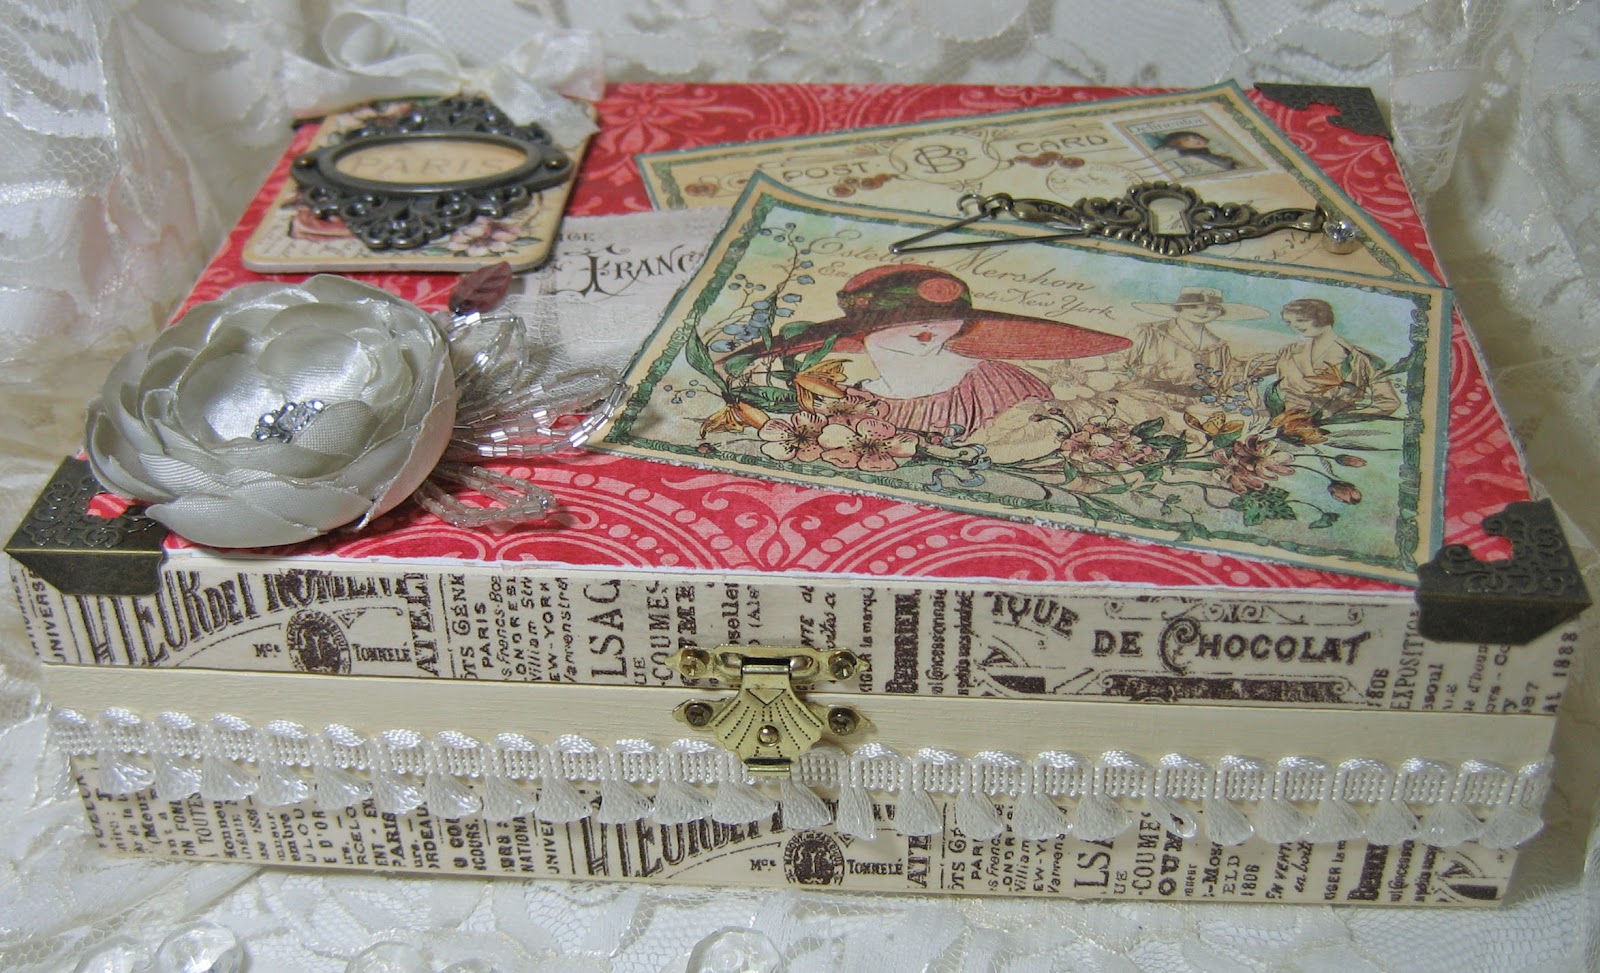
    First I'd like to share this "Keepsake Box" (cigar box) that I embellished.


    The 'cigar box' is from JoAnn's unfinished wood section. Before I painted the box with Plaid Apple Barrel "Antique White" paint......I removed the hardware. I went over the brass closure & hinges with my Black Soot Distress Ink marker to try & tone down the brassy-ness.  (It doesn't show in the pics but it's not as shiny.)


    I then covered the larger surfaces of the box with beautiful Graphic 45 papers called "A Ladies' Diary" and a coordinating soft red decorative paper from BoBunny using Scotch Quick-Dry Adhesive that I brushed on. I then wrapped all around the box with Tim Holtz tissue tape and a tassel trim from my stash.

    The postcards on the top are also from "A Ladies' Diary" collection. I love these papers so much that it's hard for me to cut into them.  LOL I distressed the edges with Tim Holtz paper distresser & Distress Ink 'frayed burlap'.

    Here are more views of my box.


    The beautiful metal corners are from Tim Holtz' idea-ology line.


    This beautiful flower is from EK Success Jolee's Boutique called 'grey burnt edge gem center flowers'.   The "leaves" are from sprays that I found in Michael's wedding section. You might also notice a Kaiser Craft skeleton leaf peeking out from under the flower.


    I made the stick pin with glass beads & baubles from my stash (attached each piece with Glossy Accents). I plan on making more of these so be looking for them in an upcoming blog candy or two. They are very addictive.

    I found the word "Paris" on the Graphic45 paper & decided to frame it with a Tim Holtz 'ornate plate'. I cut some transparent plastic & the "Paris" graphic & attached them to the inside of the 'plate' with some Glossy Accents. It was then attached to a thick tag from the same "A Ladies' Diary" line.


    This sweet little metal doo-dad hanging from the Tim Holt 'hanger clip' is from a new jewelry line that Michael's is now carrying called "art-i-cake" by Amy Labbe. She even has a sweet little bio on the inside of her charm packets. These pieces are truly little works of art.

    This is the inside of my box.  More of the beautiful Graphic 45 & Bo Bunny papers.


    I had to restrain myself from adding any more to the beautiful papers.  "Less is More" right?  LOL  So not me.  LOL  But I'm glad I didn't do more..........I wanted to leave room for her to hide away her little treasures.  She told me that she's going to use her "Keepsake Box" for her "trip momentoes".


    Thanks so much for joining me today & I look forward to sharing more over the next few days.

    (The cute little vintage girl image at the top of this post is courtesy of Peggy Loves Vintage)

    Huggies & Sweet Blessings ~♥♥♥~